Support Home » VirtualHostX » How To's
How to use a custom domain name with VirtualHostX
Last Updated December 10, 2019
By default, VirtualHostX 8.0 requires the URL of the websites you create to end in .vhx.cloud. This restriction is in place so we no longer have to prompt for your Administrator password every time you save your changes.
But some users may want to use a custom domain name for testing purposes or for serving production traffic. Fortunately, that's easy!
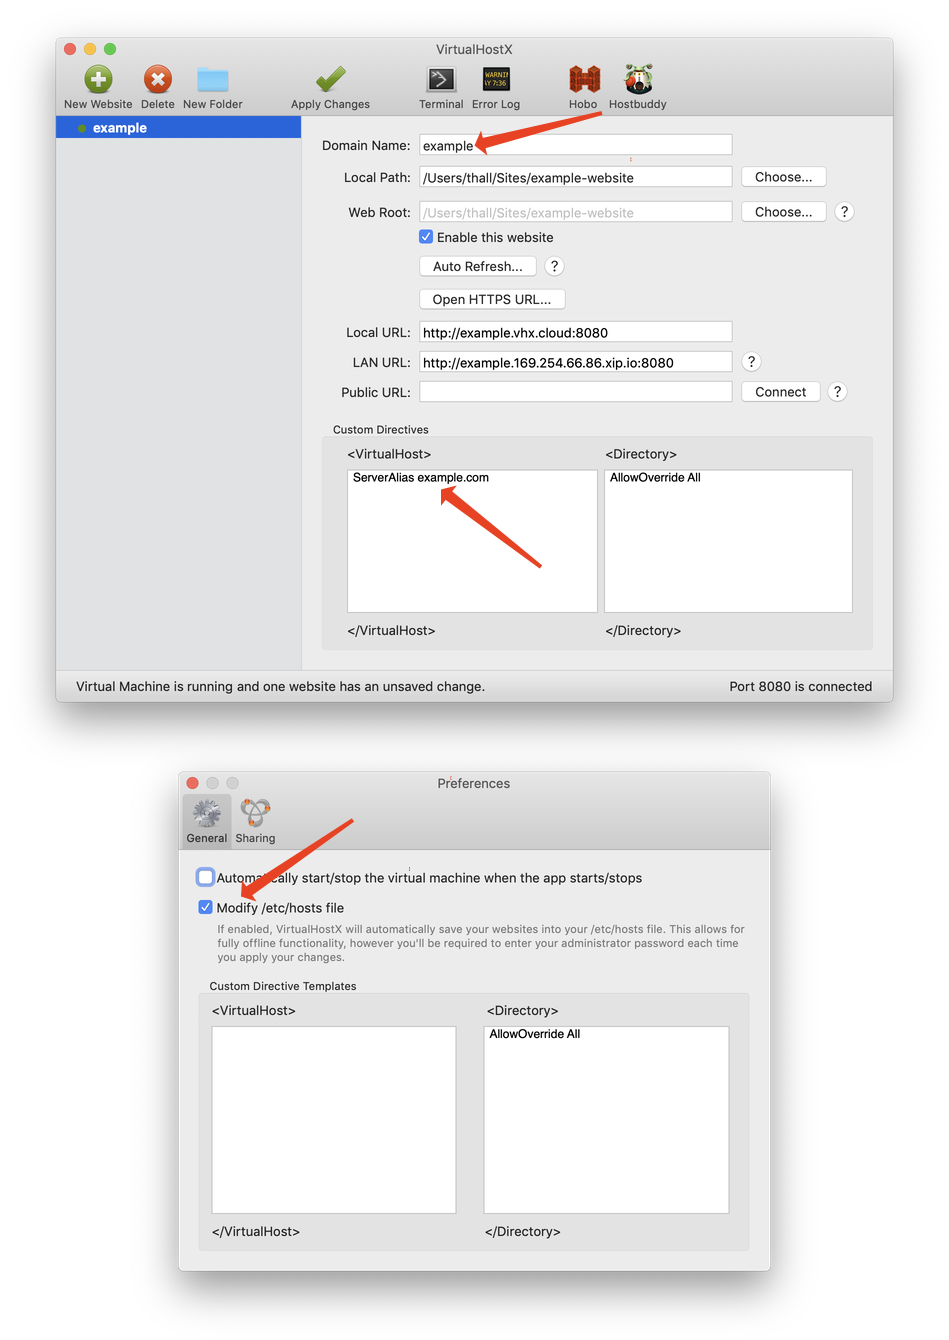
- Create your website in VirtualHostX as you normally would.
- In the custom directives box, add a line that reads
ServerAlias your-domain-name.comfor each additional domain name you want your web server to recognize. (Of course, replace "your-domain-name.com" with the actual domain name you want to use.) - Click "Apply Changes" in the VirtualHostX toolbar to save your new settings to the web server.
That's it!
Additional Notes:
- In order for your custom domain name to be accessible to other visitors on the internet, you need to point your domain name's DNS records to your Mac's public IP address. Also, if your Mac is behind a router/firewall, you'll need to forward incoming web traffic on port 80 to your Mac's local IP address.
- If you just want to use a custom domain name for testing your website locally on your Mac, you should check the "Modify /etc/hosts" option in VirtualHostX's Preferences window. This will route your custom domain name to your local web server for testing purposes. It will not have any effect for anyone else on the public internet.
- Adding
ServerAlias example.comto your website will only makeexample.comwork - it will NOT makewww.example.comwork. If you also want to use awwwprefix with your domain name, you need to addSeverAlias www.example.comon another line in your website's custom directives box as well.