Support Home » VirtualHostX » How To's
How Do I Use My Own SSL Certificate For a Custom Domain?
Last Updated December 9, 2019
If you're using VirtualHostX in a production environment with a your own, real domain name, you may want to install a custom SSL certificate so your visitors can view your website over a secure HTTPS connection. Adding a custom SSL certificate to your website in VirtualHostX is easy.
- Select your website in the VirtualHostX sidebar.
- Choose "Import Custom SSL Certificate..." from the "Website" menu.
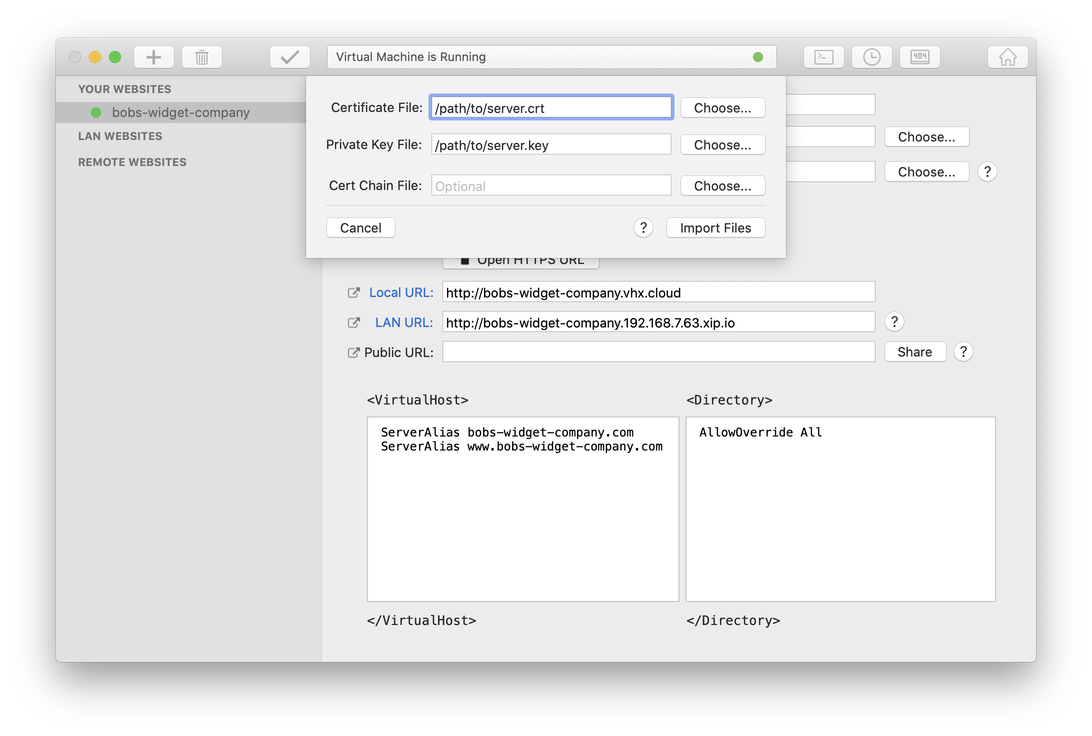
- In the new sheet that appears, use the "Choose..." buttons to select your domain's SSL certificate and the private key file for that certificate.
- Click the "Import Files" button.
- Click "Apply Changes" in the main window's toolbar to save your new settings to the web server and restart it.
A few notes...
- Importing your certificate files will copy them into a special location on your Mac where the web server will be able to find them. After you've imported them into VirtualHostX, you can safely delete your own copies from your Mac.
- Since you'll be using your own domain name, you need to tell VirtualHostX about that domain name. By default, VHX only creates a
https://*.vhx.clouddomain name to test your websites with. To use your own domain name, you need to add aServerAliassetting to your website'sCustom Directivestext box as shown in the screenshot below. You'll need to add aServerAliascommand for each domain name you want to associate with your website. - When using a custom SSL certificate with your domain name, only the owner of that domain name can obtain a valid SSL certificate for it. VirtualHostX is not able to generate the certificate for you. You'll need to purchase a certificate from a Certificate Authority company. For my own domain names, I've used Namecheap in the past. Many people are now using Let's Encrypt since they offer SSL certificates for free.